

How to Adjust uPVC Door Hinges?
A uPVC door that scrapes the threshold or leaves a narrow gap near the frame may need hinge adjustment. The change is often small. The cause, however, is not always obvious. A dropped door, loose screws, worn hinges, or a distorted frame can create similar symptoms. Look closely before turning any adjustment screw.
For this guide, uPVC door-hardware specialist Daniel Reed offers this practical reminder: “Make small adjustments, then test the door before turning anything again.” That is a useful rule for Upvc Door Hinges, especially when the door has multiple adjustment points. A suitable Allen key or screwdriver, steady support, and good light can make the work easier. Check the hinge manufacturer’s instructions, because designs and adjustment directions vary.
Adjustments may change the door’s height, side-to-side position, or compression against the seal. Move one hinge slightly at a time, then open and close the door gently. Watch the latch, frame clearance, and weather seal. Don’t force a stiff screw; it may be damaged or unsuitable for adjustment. Sometimes the visible misalignment is only part of the problem. If a hinge is cracked, the frame is loose, or the door still catches after careful adjustment, ask a qualified door fitter to inspect it. The process sounds simple, and often is—but guessing can make alignment worse.
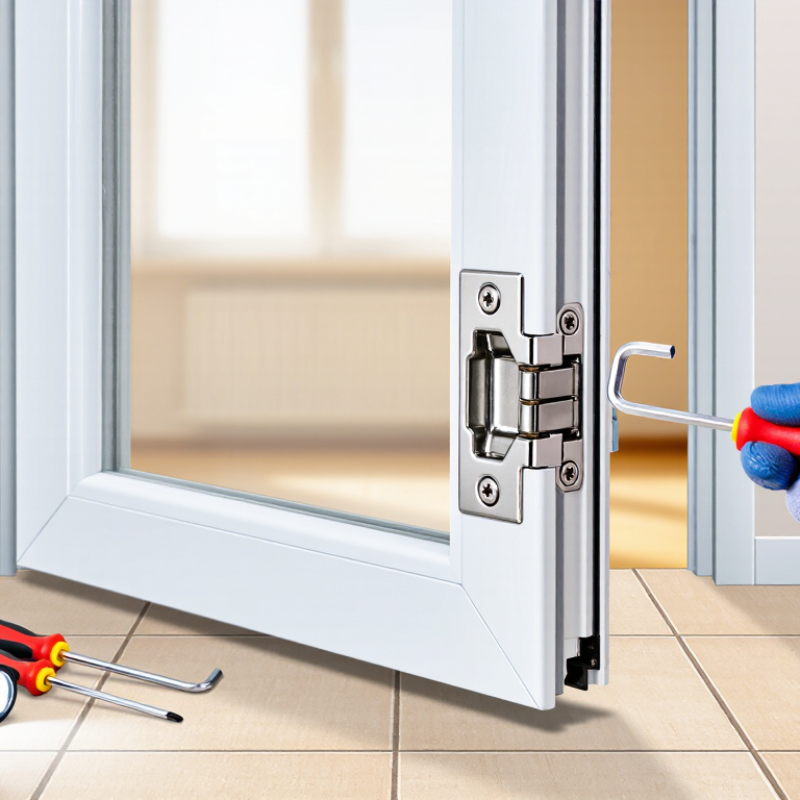
Understanding How uPVC Door Hinges Work
How to Adjust uPVC Door Hinges?
Understanding How uPVC Door Hinges Work
A uPVC door hinge connects the sash to the frame and carries the door’s weight as it swings. Many modern hinges allow small adjustments in three directions: height, sideways position, and compression against the seal. The exact controls vary by hinge design, so check the manufacturer’s instructions before turning any screws. A hinge may look simple, but its settings affect how the door closes and seals.
Height adjustment moves the door up or down. Sideways adjustment shifts it toward or away from the hinge jamb. Compression changes how firmly the door presses against its rubber weather seal. If the handle feels stiff or a corner rubs the frame, the problem may involve alignment rather than a faulty lock. Look for uneven gaps, scuff marks, or a seal that appears flattened in one area. Small clues matter.
Adjust only a little at a time, then open and close the door to check the result. Use the correct tool, and avoid forcing a screw that resists turning. Some hinges need a cover removed to reach their adjustment points. I used to assume that tightening every visible screw would improve alignment; it can instead make adjustment harder. If the door is heavy, badly dropped, or still catches after careful changes, ask a qualified installer to inspect it. The confusing part is that several hinges can share the load, so changing one may affect the others.
Identifying the Hinge Type and Gathering the Right Tools
Before adjusting a uPVC door, identify the hinge style. Many doors use flag hinges, butt hinges, or adjustable 3D hinges. Their adjustment points can look quite different. Open the door and inspect each hinge, including any plastic cover. A small flashlight helps reveal recessed screws. Flag hinges often have adjustment points on the hinge body, while butt hinges may expose screws along the knuckle or frame side. Do not assume every hinge on the same door adjusts in the same way.
Gather a set of correctly sized Allen keys, a suitable screwdriver, a ruler, and sturdy door wedges. Keep a helper nearby if the door feels heavy or unstable. Support it gently before loosening anything. Measure the gaps around the door first; note where they are narrow or uneven. This gives you a reference instead of relying on memory. Take your time. I have found that the right tool matters more than extra force: a poorly fitting key can round an adjustment socket. Sizes vary, so test the fit carefully. If a screw resists, stop and check the hinge instructions or seek qualified help rather than forcing it. I still find hinge covers awkward to remove, and rushing that step can damage the plastic.
Checking Door Alignment Before Making Adjustments
Before adjusting uPVC door hinges, check how the door sits in its frame. Close it slowly and look at the gap along the top, sides, and threshold. Is the space even, or does it narrow near one corner? A strip of paper can help: slide it between the door and frame at several points, then compare how firmly it holds. Look closely. Also note whether the door rubs, catches, or needs lifting before the latch lines up. These clues help distinguish a hinge issue from a problem with the frame or latch.
Check the frame with a small spirit level, and inspect the door edges for fresh scuff marks. Don’t judge alignment from one corner alone; flooring or an uneven frame can make the picture less clear. Take your time. If the door is visibly warped, a hinge is loose or damaged, or the frame itself appears out of square, adjustment may not solve the problem. It is easy to blame the hinges too soon. Write down where the gap looks widest and where contact occurs, so any later adjustment can be small and deliberate.
Adjusting Hinge Height, Side-to-Side Position, and Compression
How to Adjust uPVC Door Hinges?
A door that scrapes the frame or leaves a draught may need a small hinge adjustment. Check the hinge type first, because adjustment points vary. Open the door and look for capped screws or slots on each hinge. Use the correct screwdriver or hex key, and support the door if it feels heavy. A dropped door can be awkward to handle alone.
For hinge height, locate the vertical adjustment screw, often beneath a cap. Turn it a little, then check the gap along the top of the door. Side-to-side adjustment shifts the door toward or away from the lock jamb. Adjust each hinge in small, even increments so the door stays square. Go slowly. Close the door gently after each change and watch for rubbing at the corners. I have found that a quarter-turn can be enough; more turning is not always better.
Compression controls how firmly the door seals against the frame. Find the adjustment point on the hinge edge, then make a small change and test the seal with a strip of paper. It should pull out with some resistance, not tear or slide freely. If the door becomes hard to lock, ease the adjustment back. Some hinges do not offer all three adjustments, so avoid forcing a screw that will not turn. If the frame is damaged or the door remains misaligned, ask a qualified installer to inspect it.
How to Adjust uPVC Door Hinges
Typical first adjustment to check for common door symptoms. Values are qualitative: 1 means the adjustment is relevant to check; 0 means it is not usually the primary adjustment. Hinge designs vary, so consult the hinge manufacturer’s instructions and make small adjustments.
Testing the Door and Resolving Common Alignment Problems
Check the door before adjusting anything. Open it halfway and release it; it should stay put, not swing or scrape. Look at the gap around the frame: a noticeably wider gap at the top can point to a dropped sash, while rubbing at the threshold may indicate poor vertical alignment. Close the door gently, then test the handle and lock. A strip of paper trapped between the seal and frame should resist a light pull; a loose patch can reveal uneven compression. Small clues matter.
Turn the hinge adjustment in small increments, following the hinge maker’s instructions, since mechanisms vary. Retest the door after each change. If the lock now catches, or the seal bulges, back off and reassess; I have found that chasing one tight corner can create another problem. The European standard EN 12207:2016 defines four air-permeability classes, with laboratory testing at pressure steps up to 600 Pa. That figure is a benchmark, not a household adjustment target. A paper test cannot reproduce a lab test, but it can help locate leaks. Stop if the frame shifts, screws spin, or the door needs force to latch; a qualified installer can check hinge wear, frame fixing, and seal condition.
| Test or Symptom | What to Check | Likely Cause | Adjustment or Action | Retest Result |
|---|---|---|---|---|
| Inspect the door gaps | Compare the gaps around the top, sides, and bottom. Look for a gap that narrows noticeably at one corner. | The sash may have dropped, or the hinges may need lateral or height adjustment. | Identify the hinge adjustment points and consult the door or hinge instructions. Adjust in small increments; adjustment directions vary by hinge design. | Gaps appear more even without the door touching the frame. Use the manufacturer's specified clearances where available. |
| Door catches on the bottom | Open and close the door slowly, noting where the bottom edge makes contact with the threshold or frame. | The door may have dropped, or the frame or threshold may be out of square. | If the hinge model provides height adjustment, raise the sash gradually and evenly as directed. Do not force the hinge or turn an unidentified screw. | The door clears the threshold through its full swing and does not scrape when closed. |
| Door catches along the side | Check the latch-side edge and hinge-side edge while slowly closing the door. | The sash may be positioned too close to one side, or the hinges may be misaligned. | Use the hinge's lateral adjustment, if provided, following its instructions. Make a small change, then check the full perimeter again. | The edge clears the frame evenly and the door closes without rubbing. |
| Latch does not meet the keep smoothly | Check whether the latch lines up with the strike plate and whether the handle operates without excessive force. | Door height or side-to-side position may be incorrect; the keep or locking hardware may also need inspection. | Correct the door position at the hinges first. If alignment is correct but the latch still misses, inspect the keep and hardware rather than forcing the handle. | The latch enters the keep cleanly and the handle returns to its normal position. |
| Draught or uneven seal contact | Look for sections of gasket that appear loose, flattened, or less compressed than the rest. Check for visible daylight around the closed door. | The sash may not sit evenly against the seal, or the gasket may be worn or damaged. | Check hinge compression adjustment only if the hinge supports it. Inspect the gasket and follow the door manufacturer's guidance; do not over-compress the seal. | The seal contacts evenly around the door, and the door still closes and locks without excessive force. |
| Check hinge fixings | Look for loose screws, movement at the hinge, cracked uPVC, or a hinge that appears bent or damaged. | Loose or damaged fixings can prevent reliable adjustment and may affect door support. | Tighten accessible fixings only as recommended for the hinge. Stop if a screw spins, the profile is damaged, or the hinge is under strain; seek qualified repair. | Hinges remain secure and the sash does not shift when gently tested. |
| Final operation test | Open and close the door several times, then test the latch and lock with the door fully closed. | An adjustment may have improved one area while creating friction or misalignment elsewhere. | Recheck the gaps, clearances, seal contact, and latch after each adjustment. Make only one small adjustment at a time. | The door swings freely, closes evenly, and locks without scraping or unusual force. |
Note: uPVC hinge designs and adjustment directions differ. Use the hinge or door manufacturer's instructions, and contact a qualified door technician if the frame, hinge, or locking mechanism is damaged.